Support for the ULM200 Iron On Clothing Label Printer
Set Up Your New Iron On Clothing Label Printer
Troubleshooting Video Library
Problem: check media error
Solution: move sensor to correct location
Problem: CW labels coming off in the wash
Solution: check print side, temperature, pressure, time
Problem: printer is producing blank lables
Solution: replace ink ribbon
Problem: torn ink ribbon
Solution: tape it back on the core
Problem: vertical lines in print
Solution: clean your print head
Problem: labels aren't tearing of the printer well
Solution: push labels down toward the table
Problem: You want a new size Iron On Label
Solution: Download new print templates
Support Tips To Set Up The Thermal Transfer Clothing Label Printer
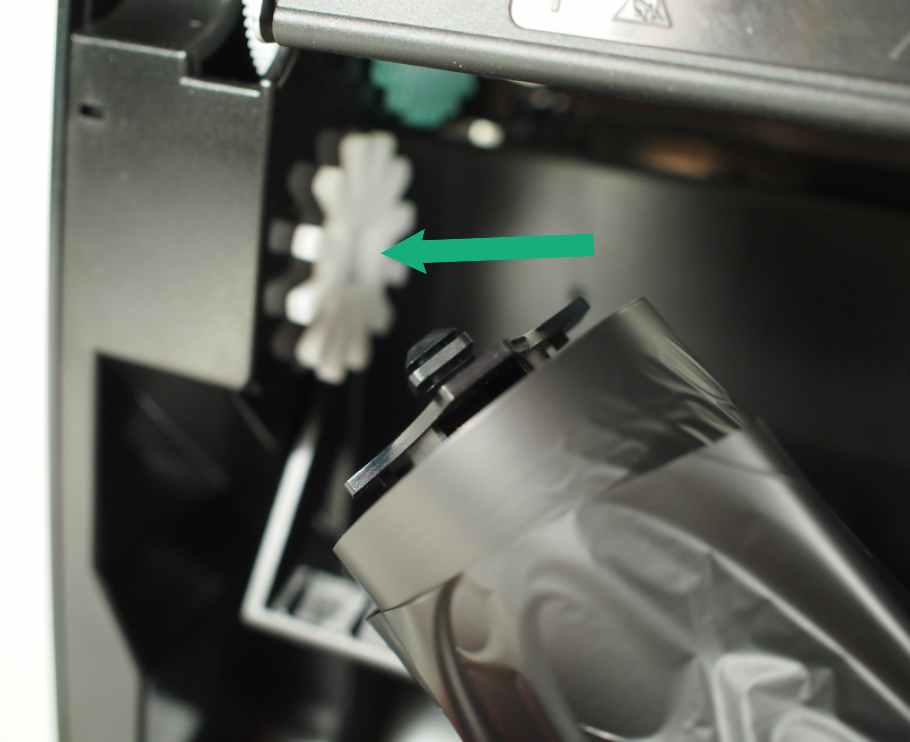
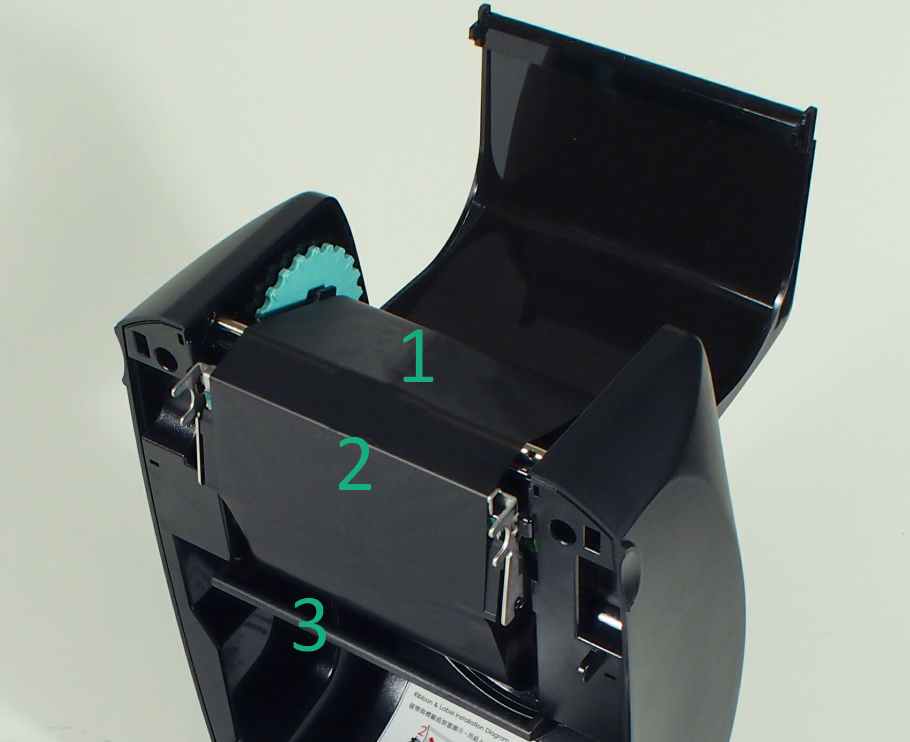
Support Tip : Place the unused resin ribbon (the large roll) on the white gear.
Support Tip: Place the dispense core (the small roll) on the green gear.
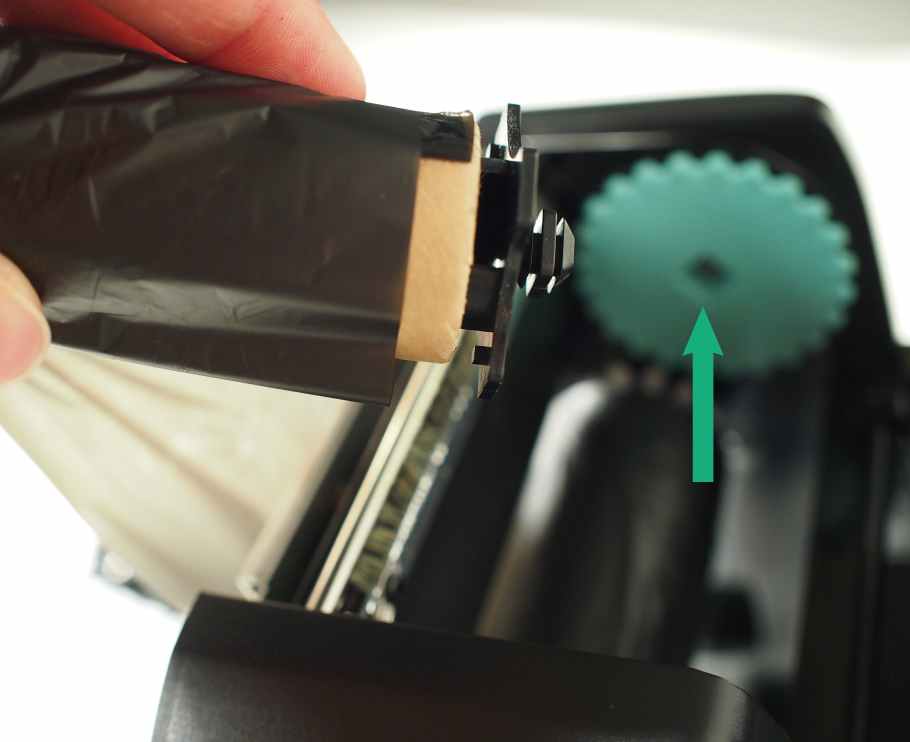
Support Tip #1: Here is how the Resin Ribbon should look when correctly installed (no blue plastic should be showing). Make sure the ribbon winds up clockwise over the top of the core. To wind up the ribbon, turn the green gear clockwise.
Support Tip #2: There is a dull and shiny side to the ribbon. The dull side should be showing when the ribbon is installed.
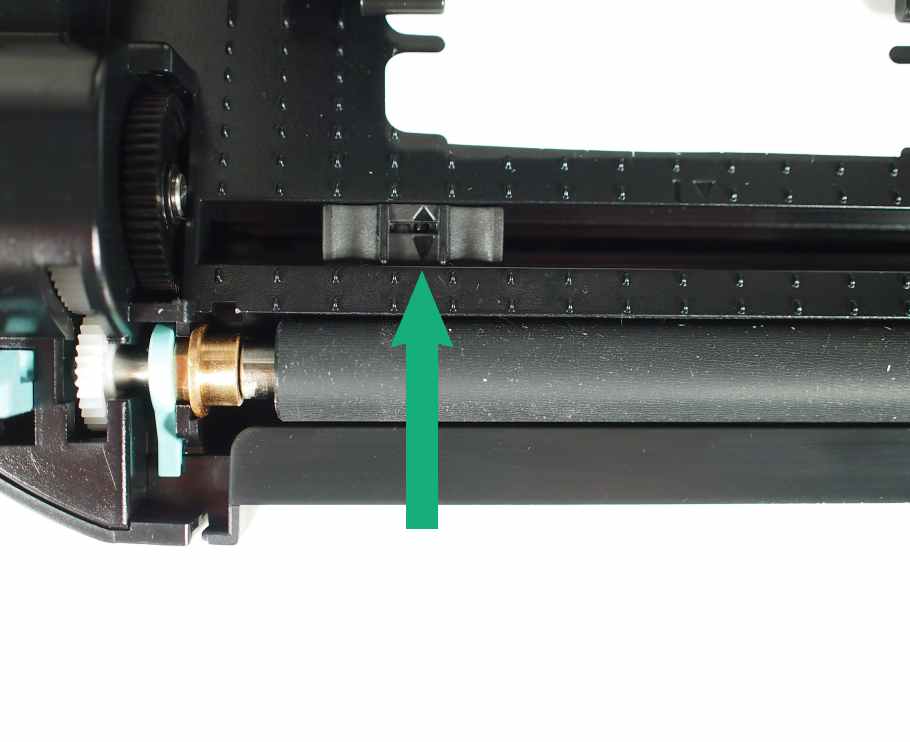
Support Tip #3: Make sure the unused ribbon is unrolling from the bottom of the roll and not touching the black lever below it.
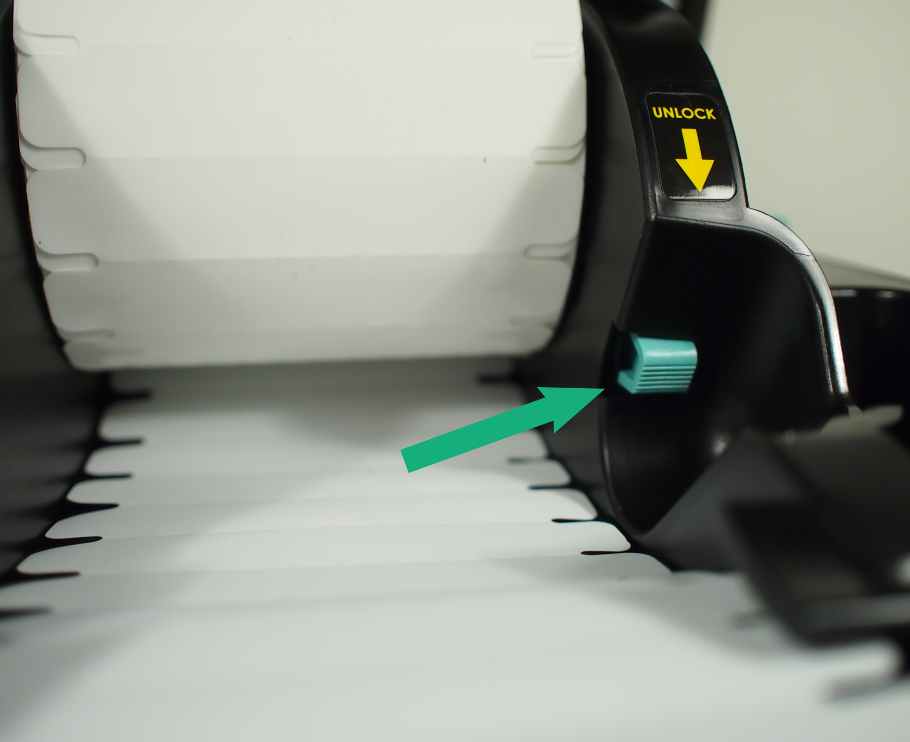
Support Tip: Install the Heat Seal Clothing Labels in the printer using the unlock button on the right-side bracket. The two brackets will move in unison to squeeze the roll of labels in the center of the printer.
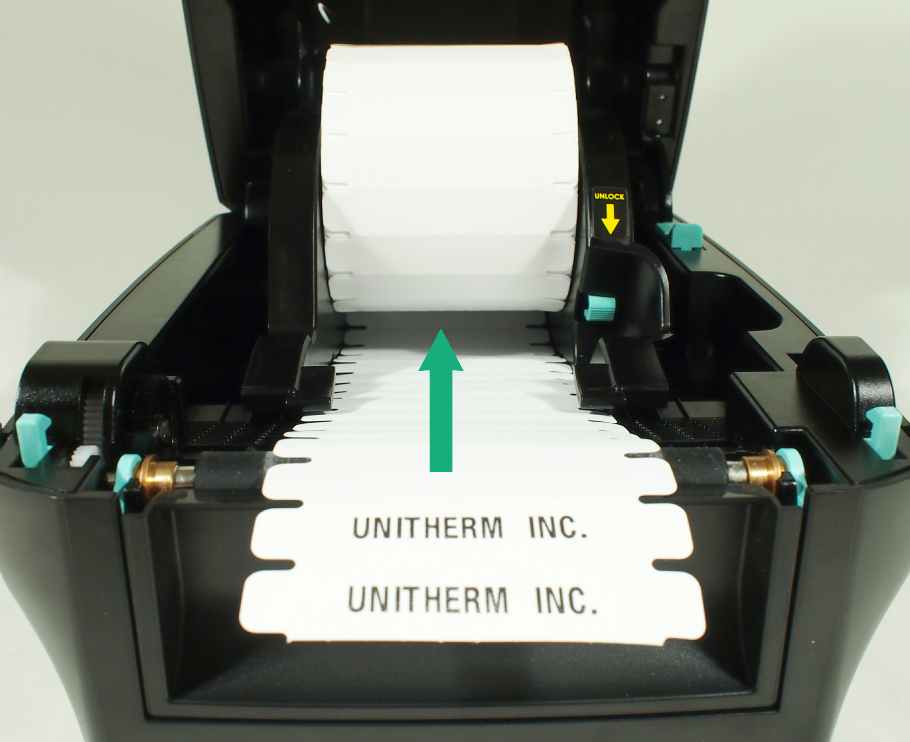
Support Tip : Make sure the Heat Seal Labels unroll from the bottom of the roll. This will ensure proper tracking and printing.
Support Tip: The sensor arrow on the printer should line up with the left-side notches of the Clothing Labels. This ensures proper label tracking. The sensor is factory pre-set. If the sensor is moved, the printer will display a “Check Media" error on its LCD screen, and restrict printing.
The sensor shines light when printing and records light levels. The light levels are different when the notches pass over the sensor. Because the notches are evenly spaced, the printer can determine the label size and when to print.